Integrate GPT-3 with your Oct8ne’s bot (in five minutes!)
GPT-3 (Generative Pre-trained Transformer version 3) is a deep learning model developed by OpenAI (www.openai.com) focused on natural language processing, which has been trained with a large amount of information and is capable of “understanding” texts that we provide it to answer questions, classify data, detect intentions, rewrite texts or translate them into other languages; to name a few of its utilities.
Follow these steps to integrate GPT-3 with Oct8ne:
- Create an OpenAI account and get an API access key
- Create a conversation with the Oct8ne’s drag & drop designer that requests the user the entrance text to GPT3 and display the response obtained using the OPenAI API.
Let’s see how to do it:
1. Create an OpenAI account and obtain an API key
To access the OpenAI API, simply visit the OpenAI website at https://openai.com/api/ and register as a user. Registration is free, but you can use the platform for a limited number of times, so, after that you will need to sign up for a paid account to continue.
After registration, we must access the API keys menu, where we will use the “Create a new secret key” button to generate a new API access key.
We must save this key because we will use it later.

2. Model the conversation
Using Oct8ne’s bot designer, we are going to create a simple conversation, in which we only will ask the user the query to be made to OpenAI’s GPT-3 model and we will show the answer, ending the conversation at that moment.
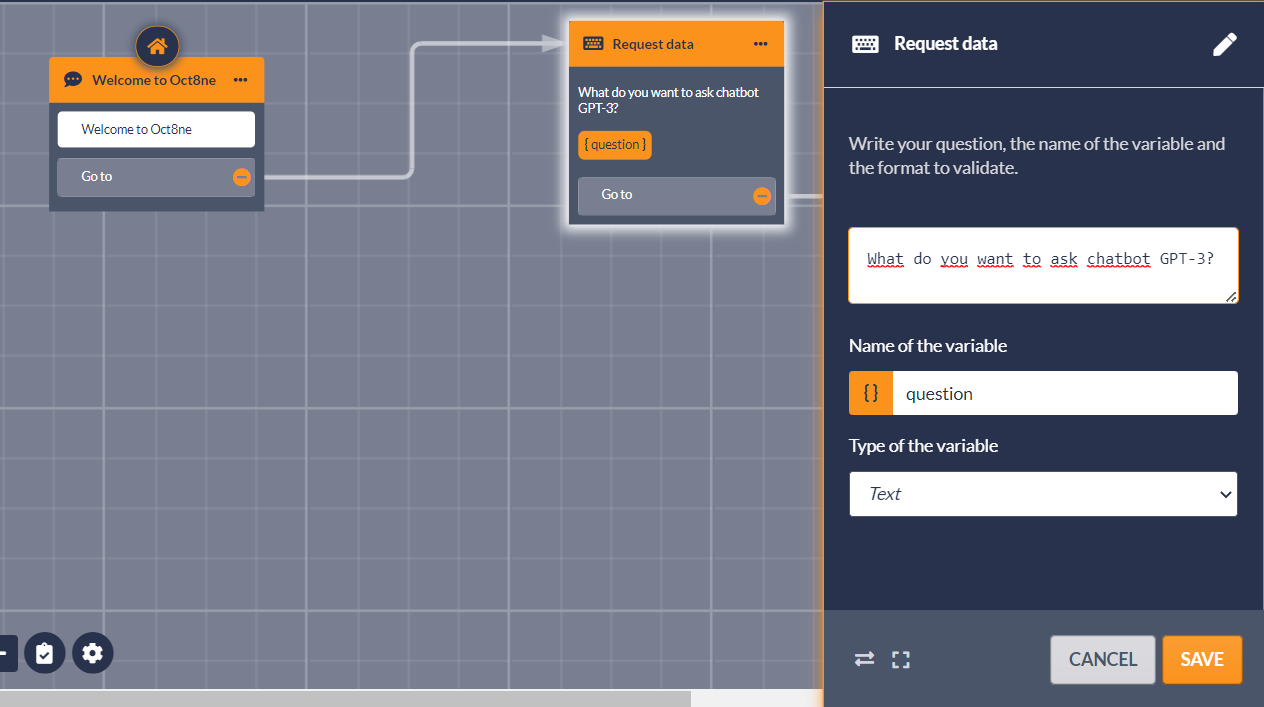
For that, we will use the action “Request data” of the bot designer to request the text from the user. The introduced information will be stored in the “query” variable:
Next, insert an “HTTP Request” action in the conversation. This action allows sending or requesting information from external systems that have a public API, such as OpenAI.
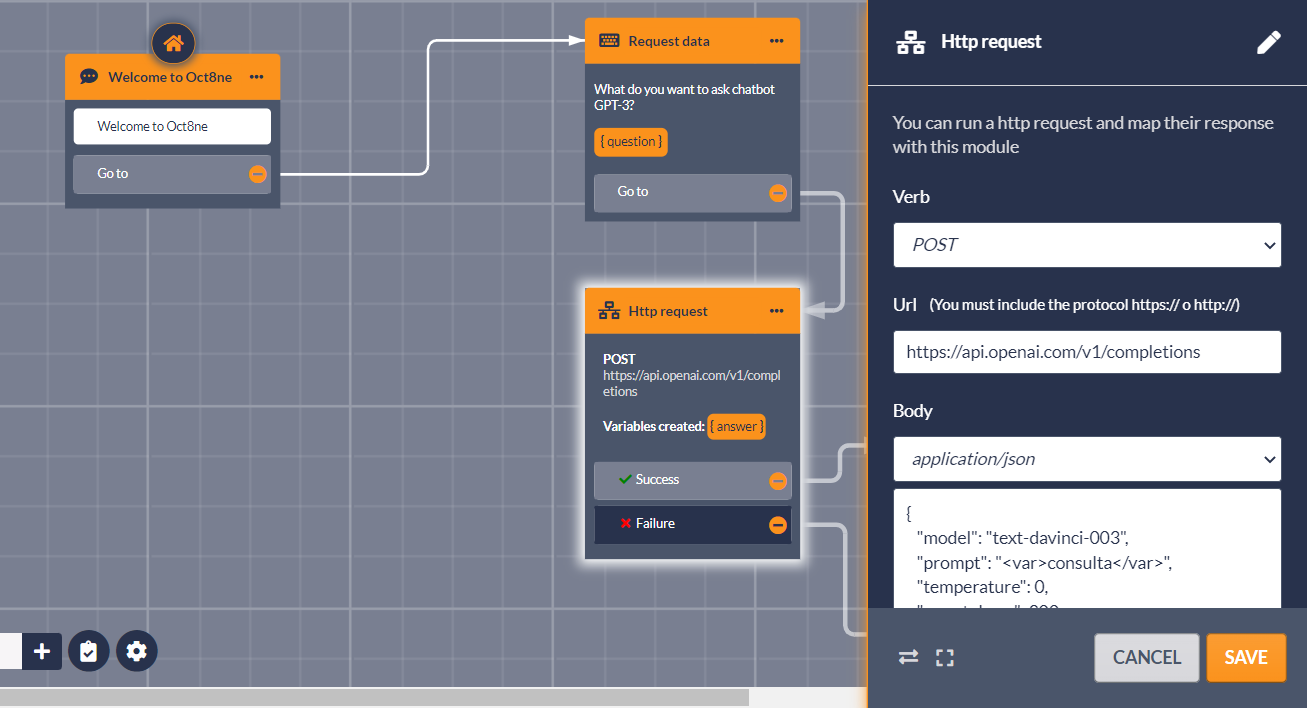
The “HTTP Request” action must be configured following the next basic aspects:
- The verb must be “POST”
- The URL must be the one provided by OpenAI for the API, which in this case is “https://api.openai.com/v1/completions”.
- For the petition body we must select the option “application/json”, and in the text area use the following content:
{
“model”: “text-davinci-003”,
“prompt”: “<var>consulta</var>”,
“temperature”: 0,
“max_tokens”: 300
}
The values we are supplying indicate that the GPT-3 model we are going to use in the query is “text-davinci-003”, which is the most powerful of the generic pre-trained base models provided by OpenAI. But we could use other available models or even custom trained models to cover more specific scenarios.
The “prompt” is the text we are going to send to the API. As you can see, in this case we introduced the content of the variable “query”, which is exactly where we have stored the text entered by the user.
With the “temperature” parameter we regulate the degree of creativity and randomness of GPT-3 responses. We can indicate values between zero and one, where zero will yield more predictable results, while one will return more creative responses (although also more likely to be wrong).
Finally, “max_tokens” allow us to limit the size of the responses. Keep in mind that the OpenAI API account has costs depending on the size of the texts we send and receive, so it is a way to control the cost.
Once these points have been configured, we still need to set two more configurations in the “HTTP Request” action:
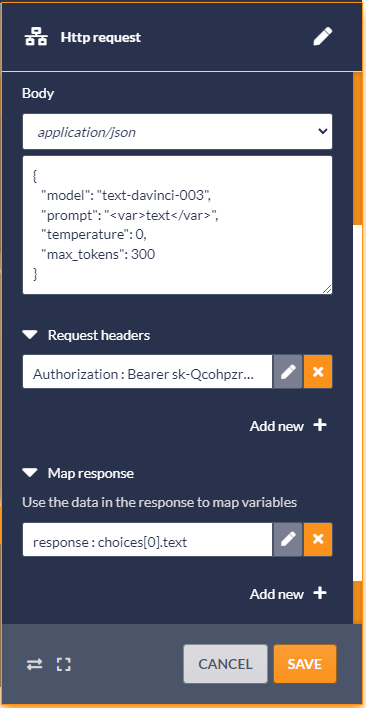
- In the “Request headers” sections, we must add a header called “Authorization”, whose value must be the API usage key that we have previously obtained from the OpenAI website.
- In the “Response mapping” section, add a mapping so that the “response” variable is loaded with the content of “choices[0].text” field returned by the API.
Next, and finally, we must show the result to the user. This only consists of adding a “Chat” action including the result obtained from the API in the interface of the conversation (either WhatsApp web, Messenger, etc.) Finally, we will link and “End” action so that the conversation is finished at that moment, although we could also choose the return to the “Ask for data” action to allow the user to make a query again.
We will see an example of this below:
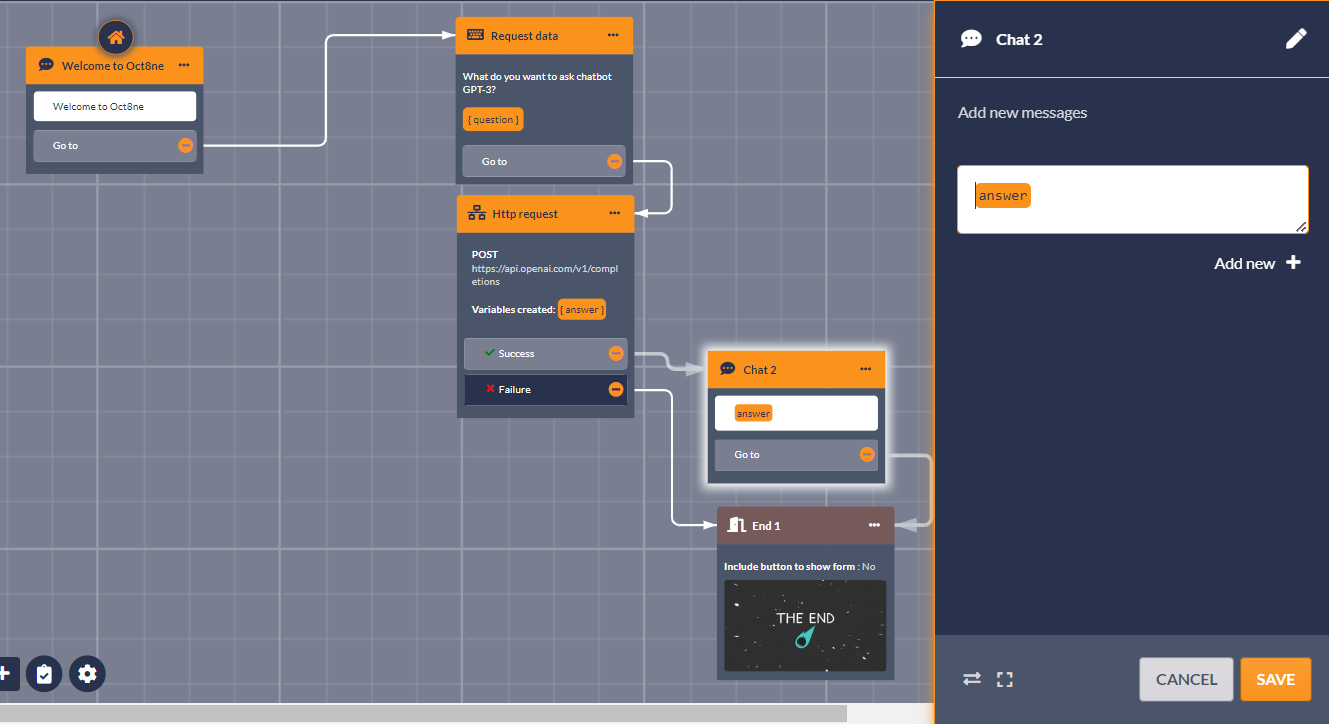
And that’s all! If we launch the bot at this moment, we will be able to check that it’s ready to answer our queries, always offering amazing results.
A more complete example
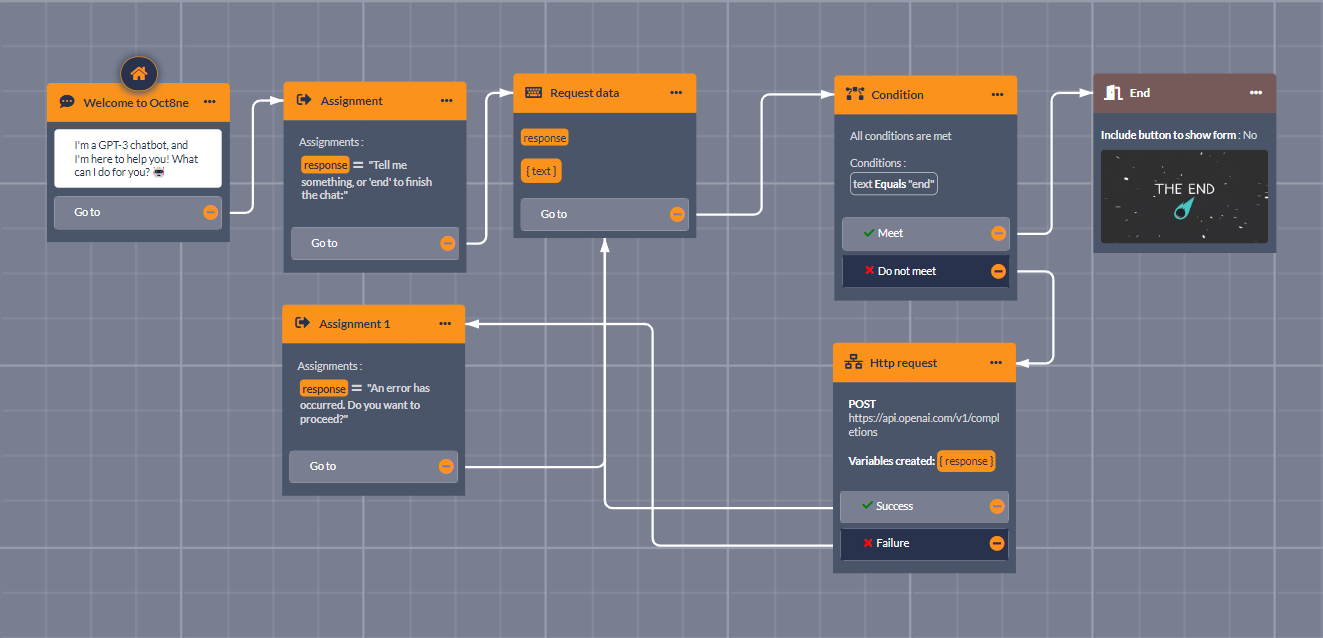
The following conversation reflects basically the steps we have described before, although we have added a “wrapper” to make the result more professional and interactive for the users.
We start the conversation by greeting the visitor, and then we indicate that it is possible to introduce the query, or “end” to end the conversation.
In case you want to end, we will simply take the flow to the “End”, which will close the conversation. In another case, we will use the “HTTP Request” action to send the input text to OpenAI and wait for the response, which will be stored in the variable called “response”.
Then, we will go back to the starting point to request another input text to the user, again, until the “end” text is entered.
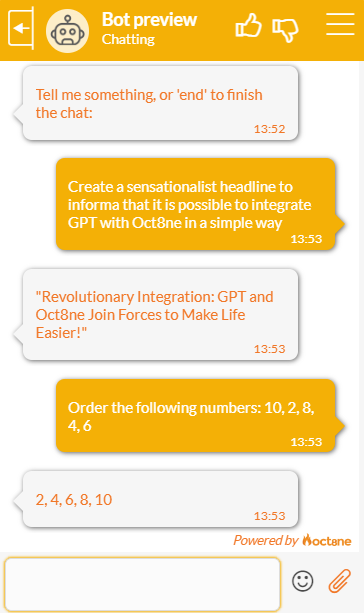
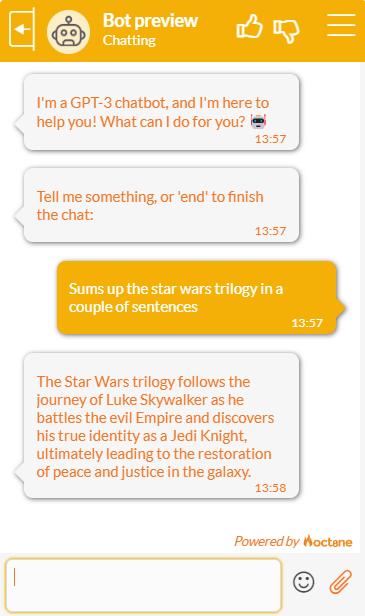
By launching the bot, we will be able to have interesting conversations such as the following:
